Odie's GLX MN MY12 Build-up

Want to show off what you've done to your rig? or have a custom project to show? Post it up here!

Odie's GLX MN MY12 Build-up

Postby odie602r on Sat Jul 07, 2012 6:52 pm

Well, some of this will be slightly retrospective, as I purchased the brand new Triton in the beginning of Feb 2012.

First ever brand new car I've ever purchased - something I said I would never do! But after looking at the price of 2nd hand relatively new dual cab 4x4s, coupled with Mitsubishi's $34,990 driveaway including alloy wheels and side steps, 12 months rego etc on a GLX, we decided it was an offer too good to pass up.

Has been the fruition of a dream of my wife and I for 17 years, of owning a 4WD. We love camping, going out and getting our own firewood for the winter etc, but have always been somewhat hampered by a standard car. Now it's time to start living the dream!

Decided to go with the GLX over the GLR, for a few reasons. No carpet, so easier to clean, especially with 3 active boys! To me, no other significant difference between the two models, other than some cosmetics (door handle, radio surround, leather gear knob etc). To me, that stuff makes no difference.

So, on top of the driveaway, we opted for the factory Alloy bullbar, with Narva Ultimate 175s. Yeah, I know they're not the best lights around, but they are brighter than not having any!

Click to view larger picture

Also immediately traded in the factory tyres for a set of Cooper ST-Maxx 245/75/16s. Look good I reckon.

Click to view larger picture

Click to view larger picture

Decided on an ARB canopy too - liked it better than any of the genuine ones, and went with lift up windows all round.

Click to view larger picture

Threw on a set of genuine neoprene seat covers front and rear - waterproof and very hard wearing

Click to view larger picture

Click to view larger picture

So begins my build up....

Oh yeah, can't forget, got a set of the rubber mats thrown in too - front and rear. Really good protection

Click to view larger picture
the truth will set you free

My build thread:
http://www.newtriton.net/phpbb/viewtopic.php?f=51&t=11704
User avatar
odie602r
Platinum Subscriber
 
Posts: 730
Joined: Wed Feb 15, 2012 7:08 pm
Location: Country SA


Odie's GLX MN MY12 Build-up

Postby joelzo on Sat Jul 07, 2012 6:57 pm

Lookin good so far. Plenty of wallet draining inspiration around here!
hmmm 255 character limit hey...
User avatar
joelzo
 
Posts: 181
Joined: Wed Mar 16, 2011 6:38 pm
Location: Northern Suburbs, Melbourne.

Re: Odie's GLX MN MY12 Build-up

Postby odie602r on Sat Jul 07, 2012 7:04 pm

Yep, I've discovered that!

Done a heap more to it since, with photos ready to go. Will gradually add to this thread and get it up to speed with the vehicle as it is at the moment.
the truth will set you free

My build thread:
http://www.newtriton.net/phpbb/viewtopic.php?f=51&t=11704
User avatar
odie602r
Platinum Subscriber
 
Posts: 730
Joined: Wed Feb 15, 2012 7:08 pm
Location: Country SA

Re: Odie's GLX MN MY12 Build-up

Postby andyj on Mon Jul 09, 2012 5:17 pm

Looking good.....
Or as Speedy Gonzalez once said, it won't hurt, did it
User avatar
andyj
 
Posts: 3245
Joined: Sat Oct 13, 2007 2:00 pm
Location: NSW

Re: Odie's GLX MN MY12 Build-up

Postby odie602r on Mon Jul 09, 2012 7:30 pm

Well, it didn't take me too long to discover that you can't see anything out of the back of these things - not quite so crucial when travelling forwards, but makes things a touch more difficult on the reversing moments.

Second week of ownership, I did something that bought a tear or two to the eye. Had opened my double gates to reverse out from the carport. Saw it slowly swinging back closed, but thought 'nah, that'll stop, and even if it doesn't it's going slow enough I'll reverse out first'. Well, I was wrong. Bang! scraped just under the left rear reflector

Click to view larger picture

Fortunately no breakage, just a permanent scrape :roll: :roll:

Guess that made it somewhat easier for me when another week later my lovely wife reversed into a pole :shock: - same corner, this time smashing the reflector but fortunately no other panel or paint damage :)

Only $25 to repair.

Needless to say, that factory-fitted reverseing camera at a grand started to seem like a good investment ....

anyway, we went third party only a couple of weeks later, IMO one of the best mods to get done, just from a safety perspective. Here it is ...

Can't actually even see this camera when standing or driving behind, you have to bend down and look up. Great for those would-be thieves ...
Click to view larger picture

and here's the replacement mirror. The mirror doesn't reflect quite so well, but is a fair trade-off .
Click to view larger picture

$440 installed. Great quality image, and works brilliant with just the standard reversing lights.
the truth will set you free

My build thread:
http://www.newtriton.net/phpbb/viewtopic.php?f=51&t=11704
User avatar
odie602r
Platinum Subscriber
 
Posts: 730
Joined: Wed Feb 15, 2012 7:08 pm
Location: Country SA

Re: Odie's GLX MN MY12 Build-up

Postby LJOS on Mon Jul 09, 2012 8:08 pm

Odie,

Which camera did you get and where did you get the installation done?
mort certa hora uncerta
LJOS
 
Posts: 34
Joined: Thu Apr 19, 2012 8:54 am
Location: Western Sydney

Re: Odie's GLX MN MY12 Build-up

Postby odie602r on Mon Jul 09, 2012 9:32 pm

The camera came with the NESA mirror and monitor, so I assume it is a NESA too. But I could be wrong on that one. I'll try and hunt down the original box.

I know it is a 170 degree camera, and as you can see in the photo above, I can see right over the towball, (great for hooking up the trailer), and the angle extends basically to being able to see just in front of each extremity of the tub. Very good.

Installation was done at the local Tonkins InCar Solutions franchise.
the truth will set you free

My build thread:
http://www.newtriton.net/phpbb/viewtopic.php?f=51&t=11704
User avatar
odie602r
Platinum Subscriber
 
Posts: 730
Joined: Wed Feb 15, 2012 7:08 pm
Location: Country SA

Re: Odie's GLX MN MY12 Build-up

Postby Big Damo on Tue Jul 10, 2012 10:11 am

Gday Odie. Great buildup beginnings! Those GLXs sure are great value. I managed to get mine for $37000 on road but that included auto and diff lock, although I passed on the factory alloys and sidesteps because I wanted my own steel wheels and a proper rockslider.

I KNOW I will need a reverse camera and was looking at the exact one you have just the other day...but was a little turned off by the size of the replacement mirror - due to such a long upper body I sit fairly high in the cabin, and standard mirrors annoy me at the best of times vision wise - do you have any issues with vision because of the size of the mirror?

Can't wait to see what else you've got in store for the Triton!

Cheers

Damien
Big Damo
 
Posts: 243
Joined: Sat Jun 02, 2012 4:44 pm

Re: Odie's GLX MN MY12 Build-up

Postby odie602r on Tue Jul 10, 2012 5:54 pm

Yeah, wish I had a factory diff lock for the price, but this one was in stock and available, so I took it!

I'm 6'2 ish myself and know exactly what you mean re a bigger replacement mirror. What I noticed with this one over the standard wasn't the width so much (I think they're quite similar in this regard), but more in the slightly added depth.

I'm quite fussy with things like this, and it did bug/bother me for the first few weeks, but I don't really notice it now. They did offer to swap me over to a screen mounted on the dash, but I didn't want that - would rather just look where I always have, and leave everything else clean (after all, I've got a couple of other extra things mounted within the cab - but will reveal those in the near future ...)

More importantly, my wife drives the car more than me, and she definitely didn't want a separate monitor mounted on the dash somewhere.
the truth will set you free

My build thread:
http://www.newtriton.net/phpbb/viewtopic.php?f=51&t=11704
User avatar
odie602r
Platinum Subscriber
 
Posts: 730
Joined: Wed Feb 15, 2012 7:08 pm
Location: Country SA

Re: Odie's GLX MN MY12 Build-up

Postby Big Damo on Tue Jul 10, 2012 10:55 pm

Cheers. After what you said I'm thinking now of a double din 6inch screen to replace the stereo which could facilitate a rear camera....hmmmm. Can't wait for the next reveal!
Big Damo
 
Posts: 243
Joined: Sat Jun 02, 2012 4:44 pm

Re: Odie's GLX MN MY12 Build-up

Postby odie602r on Wed Jul 11, 2012 7:41 am

Big Damo wrote:Cheers. After what you said I'm thinking now of a double din 6inch screen to replace the stereo which could facilitate a rear camera....hmmmm. Can't wait for the next reveal!


Sounds like a good solution! Maybe a sub under each seat too ....!

Actually, as a muso and someone pretty particular with audio quality, I've been pleasantly surprised with the factory stereo in the GLX 8-)
the truth will set you free

My build thread:
http://www.newtriton.net/phpbb/viewtopic.php?f=51&t=11704
User avatar
odie602r
Platinum Subscriber
 
Posts: 730
Joined: Wed Feb 15, 2012 7:08 pm
Location: Country SA

Odie's GLX MN MY12 Build-up

Postby Brent1 on Wed Jul 11, 2012 8:36 am

I agree. I love the stereo in mine. And the Bluetooth streaming the music always sounds excellent quality to me
User avatar
Brent1
 
Posts: 524
Joined: Fri Feb 10, 2012 5:00 pm
Location: Grenfell

Re: Odie's GLX MN MY12 Build-up

Postby odie602r on Wed Jul 11, 2012 9:24 am

Don't think I mentioned at the start, but I also got a genuine tubliner installed prior to taking delivery. Obviously provides great protection .......

however it is slippery :|

After getting pretty sick of having to climb in to recover whatever I (or my wife) had put in the back, I set about changing that forever ...

Somewhere on here I remembered seeing a chain had been hung from tie-down to tie-down (apologies for not referencing the original owner who thought of this - but I can't remember where I saw it), so I set about doing the same in the back of my tub ...

I put some spongy stuff (I think it is the stuff plumbers use over hot water pipes?) over the chain on the wheel arches - to stop noise etc.
Click to view larger picture

at the moment I've got my second battery strapped to the chain - still needing to put some hooks or something through the floor of the tub...
Click to view larger picture

very handy to have this permanently strapped to one side
Click to view larger picture

nicely hidden spot for a small shovel behind the plastic crate - held in place with velcro
Click to view larger picture

and for those items that we forget to tie down ....
Click to view larger picture

This was just a broom handle with a largish hook screwed into the end.

I also have a couple of elastic straps of different lengths attached to the drivers side, which I normally use pretty regularly. Also have a piece of non-slip that I can use for awkward sized objects etc.

Yeah, I know, nothing particularly exciting, all just practical, but it's the little practical things that you use on a day to day basis that makes the overall experience more worthwhile :D
the truth will set you free

My build thread:
http://www.newtriton.net/phpbb/viewtopic.php?f=51&t=11704
User avatar
odie602r
Platinum Subscriber
 
Posts: 730
Joined: Wed Feb 15, 2012 7:08 pm
Location: Country SA

Re: Odie's GLX MN MY12 Build-up

Postby odie602r on Fri Jul 13, 2012 12:28 pm

Okay, well another purely practical mod was undertaken.

After some rain (or was it after I washed it?), I noticed in the back of the canopy there was water, near the tailgate. Also, after I'd been for a drive on a dirt road, some dust had gotten into the tub.

An ARB canopy uses supports around the tailgate that means the genuine dust seal kit can't be used. So, off the Clark Rubber for a solution.

After looking from inside the tub/canopy with someone squirting water on the canopy rear window to simulate rainfall, I was confident I had nailed where some self adhesive foam needed to be placed.

For the dust in the tailgate I used 25mm W x 12mm H:
Click to view larger picture

For the leaking water I put some thin foam in two places - the first on the ARB canopy part:
Click to view larger picture

and the second place because I couldn't quite stop it all coming in, so these pieces of foam basically stop any water that does make it in from running all the way to the front of the tub. Works a treat!
Click to view larger picture
the truth will set you free

My build thread:
http://www.newtriton.net/phpbb/viewtopic.php?f=51&t=11704
User avatar
odie602r
Platinum Subscriber
 
Posts: 730
Joined: Wed Feb 15, 2012 7:08 pm
Location: Country SA

Re: Odie's GLX MN MY12 Build-up

Postby odie602r on Fri Jul 13, 2012 12:29 pm

Next edition - the beginnings of my mechanical and electrical mods ...
the truth will set you free

My build thread:
http://www.newtriton.net/phpbb/viewtopic.php?f=51&t=11704
User avatar
odie602r
Platinum Subscriber
 
Posts: 730
Joined: Wed Feb 15, 2012 7:08 pm
Location: Country SA

Re: Odie's GLX MN MY12 Build-up

Postby odie602r on Fri Jul 13, 2012 2:09 pm

Tex wrote:Some good jobs done there Odie :D Does the chain/spade bang around on rough roads :?:


Thanks Tex!

The spade doesn't really bang around with the crate strapped in front of it - keeps it in place fine. But it would bang around if the plastic crate wasn't there.

The side chains do move a bit on rough roads, but that's why I put that black foam around the chain above the wheel arches. Doesn't stop them moving obviously, but does stop the noise! Works a treat.

The chain across the front of the tub doesn't really move either, especially with the battery box strapped to it.
the truth will set you free

My build thread:
http://www.newtriton.net/phpbb/viewtopic.php?f=51&t=11704
User avatar
odie602r
Platinum Subscriber
 
Posts: 730
Joined: Wed Feb 15, 2012 7:08 pm
Location: Country SA

Re: Odie's GLX MN MY12 Build-up

Postby odie602r on Sat Jul 14, 2012 9:57 pm

Next up was the EGR blanking plate. I tell you what, this thread
viewtopic.php?f=23&t=4813
was some reading for a newbie to both a Triton, and modding or mechanical work! At the time, that thread had I think 39 pages, and I read every word in every post on every page - yep, it took a little while :geek:

Anyway, I think by the end of it I was 100% convinced blanking the EGR was a good thing, but also pretty close to 100% confused as to where to put the thing! Was able to source a blank from GLX-R Alex (I think I got his last one - maybe he should have signed it!!) and after some last minute coaching from a couple of guys did the deed. I put it under the bottom of the EGR pipe

Click to view larger picture

Tell you what, I made it difficult for myself, as I dropped one of the nuts, and couldn't find it again. I looked for 45 minutes, with torches, lights, arms and fingers looking and feeling in any and every place under that engine bay. Do you think I could find it? Nope, so off to the local Mitsu place for a replacement. (remember here, this is my first ever brand new car, and this was my first ever mod on any car, and I've gone and 'lost' the nut that means the EGR system now wouldn't seal ... I was a bit frustrated :x )

Fortunately, spare parts dept were open 'and where abouts was this bolt from sir, and what were you doing undoing the EGR pipe nut?' Um, ah, .... Anyway, they had one so back I went to fit it. Wouldn't you know it, when I reversed out the drive to take it for a test drive, out the original bolt dropped :x :) That would have been handy 50 minutes ago... Oh yeah, did I struggle trying to slide the blank in - it was soooo tight, that alone took me about 15 minutes! Retrospectively, someone suggested that I could have just loosened the four bolts holding the top of the EGR pipe in place - think I might do that when I take it out for the servicing ...

So on the test drive I did notice a slight improvement on the turbo lag, which I was pleased about. I was also looking forward to the slight improvement in economy everyone had been talking about. But that's the catalyst for my next mod ..
the truth will set you free

My build thread:
http://www.newtriton.net/phpbb/viewtopic.php?f=51&t=11704
User avatar
odie602r
Platinum Subscriber
 
Posts: 730
Joined: Wed Feb 15, 2012 7:08 pm
Location: Country SA

Re: Odie's GLX MN MY12 Build-up

Postby odie602r on Sat Jul 14, 2012 10:16 pm

So my Triton was one of the ones where the economy took an unwanted hit when the EGR blank went in. To the tune of 1.5-2L/100kms. Ouch, that I was not impressed with.

So, I then added my share of posts to the Closing The EGR thread mentioned in my previous post - trying to understand why my rig took the hit to economy, and more importantly, how to attempt to claw it back. Whilst Longranger's mods sounded the best solution known to date, I was not about to braze a line into the intercooler pipe etc (for a start, I didn't even know what a braze was, but figured it didn't have anything to do with braised steak and onions).

So, in the end I went with the One Way Valve MAP mod - man oh man was I nervous again cutting into the MAP line and installing :shock: My wife was caringly questioning - 'you do know what you're doing on our brand new car, right?' Um, honey, I've read up a lot on it, it sounds simple enough, how hard can it be ......?

Well, the answer was, it wasn't that hard :) . Remembered the hose in hot water trick to make it easy to get the MAP hose over the Tee barbs. Doesn't look too bad, I don't think :)

Click to view larger picture

I'm not planning any high water crossings any time soon, but I've still cable tied the one way valve up as high as I possibly can in the engine bay. I guess if I do a deep water crossing in the future I'll need to remember to put a plastic bag or something over it so it doesn't suck in any water!

More importantly than the looks, the One Way Valve did bring back the economy to similar to what I was getting pre EGR blank, so that was great news. And, it will also be good cheap insurance against getting a code or limp mode! Had none yet in approximately 5000kms.
the truth will set you free

My build thread:
http://www.newtriton.net/phpbb/viewtopic.php?f=51&t=11704
User avatar
odie602r
Platinum Subscriber
 
Posts: 730
Joined: Wed Feb 15, 2012 7:08 pm
Location: Country SA

Re: Odie's GLX MN MY12 Build-up

Postby trumpy955 on Sat Jul 14, 2012 10:57 pm

Wow, looks like you have spent some good times here on the forum. i cant wait to see the other mods you have planned mate. :)
I don't suffer from insanity, I enjoy every minute of it.
User avatar
trumpy955
 
Posts: 2073
Joined: Thu Feb 17, 2011 2:41 pm
Location: Gladstone , central coast QLD

Re: Odie's GLX MN MY12 Build-up

Postby Sky Miner on Sun Jul 15, 2012 8:39 am

:lol: I know the feeling 'oh crap do i really need to cut this'
Oh god i hope im doing this is rite' and of coarse shit' shit 'shit where did that bloody bolt go :shock:
yes i droped mine too but found it on the bashplate :roll: :lol:
And quote: 'do you relise/know what your doing to "our" brand new car' 'yep trust me they said it
would be ok' :lol:
In the end it's all well worth it
Good stuff mate keep it comming :mrgreen:
Ever noticed if somebody is driving slower than you is an idiot,
and anyone going faster than you is also an idiot?
Sky Miner
 
Posts: 1486
Joined: Fri Sep 30, 2011 7:32 pm
Location: Darwin N.T

Re: Odie's GLX MN MY12 Build-up

Postby odie602r on Sun Jul 15, 2012 10:19 pm

The next addition to the GLX was supposed to have been added before I put the EGR plate in, but it didn't arrive in time. So, I was driving around for a few days hoping the dreaded engine light or limp mode didn't happen, without a Scanguage to clear it.

I tossed up between a scangauge and an ultragauge - and decided in the end that the scangauge would be my weapon of choice. Two reasons really - it's slimline size seemed to make it easier to find a mounting place in a reasonably inconspicuous way, and the menu select buttons being on the front and within easy view, rather than on the back.

So, it arrived, and then there was the due consideration given to prime placement. In the end decided on here:

Click to view larger picture

The only thing that placing it here blocks is the digital odometer - the angle of this photo doesn't really show it. At 6'2 I can just about see over the top of the scangauge to the top line of the trip computer, but can't see the odometer without leaning forwards.

To me that wasn't a big trade-off, and there it's in easy reach and easy view. Oh yeah, no bolts that could be dropped and lost, or hose lines to be cut - so a very easy installation. Biggest headache (not that it was big at all) was how to keep all that excess cable tucked up and out of the way!

Haven't had to use it to clear any codes so far (One Way Valve probably helping with that) but I've had some fun fiddling with the gauges and checking out what at the end of the day is interesting but not terribly meaningful information in the bigger scheme of life!
the truth will set you free

My build thread:
http://www.newtriton.net/phpbb/viewtopic.php?f=51&t=11704
User avatar
odie602r
Platinum Subscriber
 
Posts: 730
Joined: Wed Feb 15, 2012 7:08 pm
Location: Country SA

Re: Odie's GLX MN MY12 Build-up

Postby kingy on Thu Jul 19, 2012 9:10 pm

nice job odie

got a question on ur tailgate, what seal did you use and what did you use to stick it to the tailgate

cheers
User avatar
kingy
Platinum Subscriber
 
Posts: 178
Joined: Sun May 23, 2010 9:58 am
Location: Sydney

Re: Odie's GLX MN MY12 Build-up

Postby odie602r on Sat Jul 21, 2012 7:48 am

Thanks. The tailgate seal was just a strip of weatherproof type foam from Clark Rubber (a rubber and plastics store). It comes with a sticky backing

Adhesion so far seems pretty good, as you can see its come a bit unstuck on the vertical part of the tailgate, but it's been that way after the first few weeks, ie lost some stick, and hasn't for any worse several months later. I'm getting some you beaut supa glue type stuff from an auto supplier, that ARB and the like use to stick rubber sealing strips to glass, and plan to put a bit of that on if I need to in the future.

Only cost a few dollars, and so far works pretty effectively.

My next step should I need to would be to whack in an ARB canopy vent in the canopy, at the back - for $90 installed they pressurize the tub/canopy and virtually eliminate all dust entering without needing a seal at all.
the truth will set you free

My build thread:
http://www.newtriton.net/phpbb/viewtopic.php?f=51&t=11704
User avatar
odie602r
Platinum Subscriber
 
Posts: 730
Joined: Wed Feb 15, 2012 7:08 pm
Location: Country SA

Re: Odie's GLX MN MY12 Build-up

Postby odie602r on Sat Jul 21, 2012 10:45 pm

Next instal was the boost gauge. Looking ahead I was planing to get a chip, and that throws out the readings that the scangauge gives, so wanted something to monitor what the turbo was doing. Plus, they look 8-) and if I instal it myself makes me look a combination between 8-) and :geek: (not that my worth is founded in my appearance, mind you).

Ended up going with a GlowShift 52mm, mechanical operated jobbie. Came with 7 different LED backlight colours that can be scrolled through and selected by the user, or can even automatically scroll through the 7 colours at random, if you were after that party room type of feel in the cabin :D .

After having installed the T-piece in the MAP line for the one way valve, the instal of the vac line wasn't a concern for me. However, wiring up the electricals was another matter completely, as my total electrical experience equated to wiring up some home theatre speakers and that was about it!

So, as I tend to do, lots of reading and asking questions on the instal process, including where to mount the thing, how to mount it, how to get access to it etc.

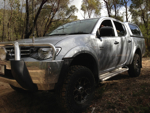
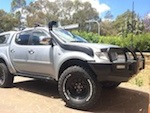
As you can see from the pic below, ended up mounting down low on the A pillar. After learning (from irwazza - thanks) how to pull off the A pillar (gee things are simple and non-threatening when you actually know how to do something!) I mounted the the gauge cup first, then fed the vac line through the grommet high up on drivers side (along with a 4mm twin core cable that were both carrying power, ie one wasn't being used as an earth - this power run was going to be for the boost gauge and anticipated EGT gauge on one cable, and the other to power up a planned UHF), behind the fuses then up and out just at the base of where the A pillar meets the top of the dash. There was just enough room for it to squeeze through in that location without squashing it.

Thinking long term down the track, with UV rays etc, I also put some heat shrink (without actually heat shrinking it) over both the vac line and the four cables of the boost gauge. Has made it look neater, and as I said, was about protecting especially the vac line from going brittle etc from UV ray exposure.

I had the gauge running for a couple of weeks without having it wired up, as I plucked up the courage to T into wires in the brand new bus, as well as have half the dash hanging apart. Figured out what to do re relays too, as while I was wiring up for the boost gauge I was going to be wiring up my new UHF (that will be the next edition - stay tuned).

For the boost gauge I needed to wire into constant power (from the new power run I'd fed through), T into accessories so that it would power up when the key was turned to ACC, then also tap into the lights circuit, as the gauge dims the LED backlighting when the lights are on (very cool), plus the earth. Had to firstly (prior to installing) solder on more length of cable, and then triple checked to make sure I had the right colour going into the right wire.

Man oh man, did I feel edgy as I T-eed into the factory wiring .....

Good news though - IT ALL WORKED - just as it should! Yippee!
Click to view larger picture

Click to view larger picture

I think it looks nice and neat, and better still, all of the wiring was the right way around - I don't know how many times I turned ACC on and off, then lights on and off to see the backlight dim and then go to full brightness, amazed that my first foray into 12v wiring went faultlessly!
the truth will set you free

My build thread:
http://www.newtriton.net/phpbb/viewtopic.php?f=51&t=11704
User avatar
odie602r
Platinum Subscriber
 
Posts: 730
Joined: Wed Feb 15, 2012 7:08 pm
Location: Country SA

Re: Odie's GLX MN MY12 Build-up

Postby odie602r on Sat Jul 21, 2012 10:47 pm

I really like the blue backlight too - if only the rest of my dash etc were blue lights and not red, the blue is so much nicer IMO...
the truth will set you free

My build thread:
http://www.newtriton.net/phpbb/viewtopic.php?f=51&t=11704
User avatar
odie602r
Platinum Subscriber
 
Posts: 730
Joined: Wed Feb 15, 2012 7:08 pm
Location: Country SA

Next

Return to Member Build Ups

Who is online

Users browsing this forum: No registered users and 13 guests


cron