CV Removal
Tool List:
Heavy ground sheet/tarp maybe 2 metres square.
Bolt/parts tin
12, 14, 17, 19mm Spanners (preferably ring spanners, ratcheting ring spanners make it a lot easier)
3/8” socket set preferably containing a uni joint or 12, 14, 17, 19mm sockets
1/4" 17, 19, 32mm sockets
1/4" Breaker Bar
3 x 3/8” or 1/4" drive extensions to make up approx 400mm length
Pry bar set
Side Cutters
Needle-nosed Pliers
CRC/WD40
Hammer of any kind.
Small lump of wood (to be used when removing wheel-end of CV).
Small Cold chisel and/or a flat screwdriver (set would be handy).
Large bearing puller (300mm?) recommended but not necessary.
Flat Pin-Punch (2mm-5mm punch)
Loctite (Grade 243)
Vehicle jack plus an extra bottle jack
Care must be taken to not lose any of the nuts or bolts or damage any threads. The original ABS ring must be removed from the broken CV and pressed onto the replacement (unless an OEM replacement with ABS ring attached is being used).
DRIVERS SIDE
1. Remove the lower bump-stop from the Upper Control Arm (UCA) using the 12mm spanner.
2. Securely stabilize the vehicle and use car stands if possible. Place the removed wheel under the sill of the car as a safety measure.
3. Remove the hub cap using a screw driver and hammer as with any normal vehicle.
4. Remove the hub nut Split Pin using side cutters or pliers.
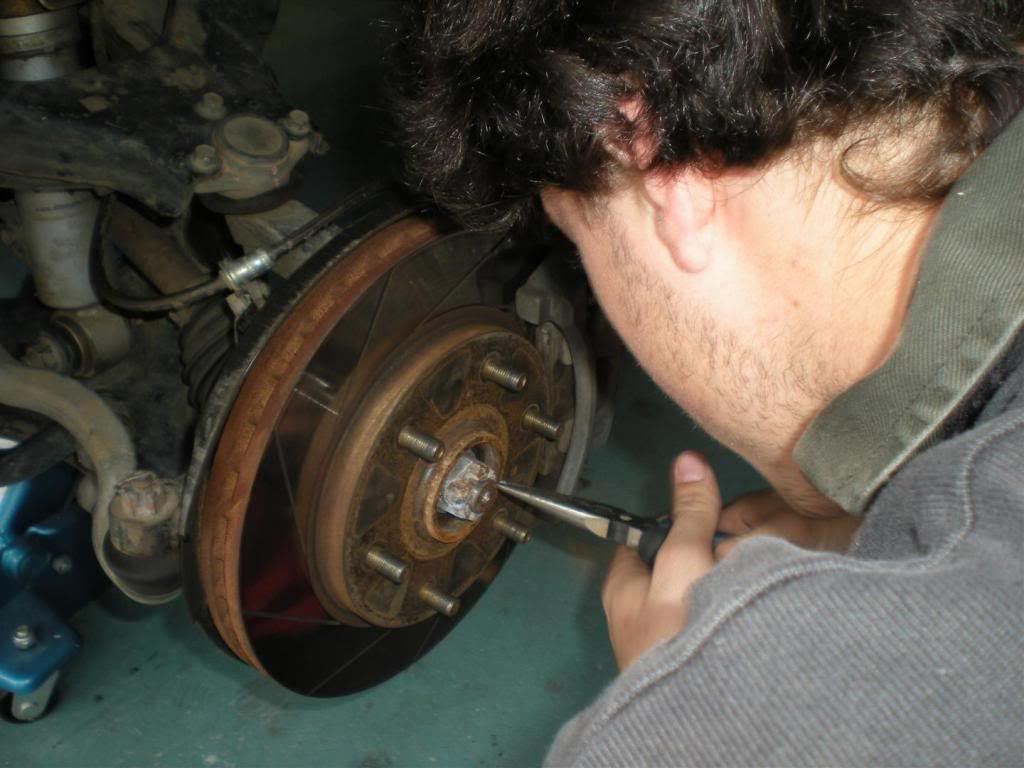
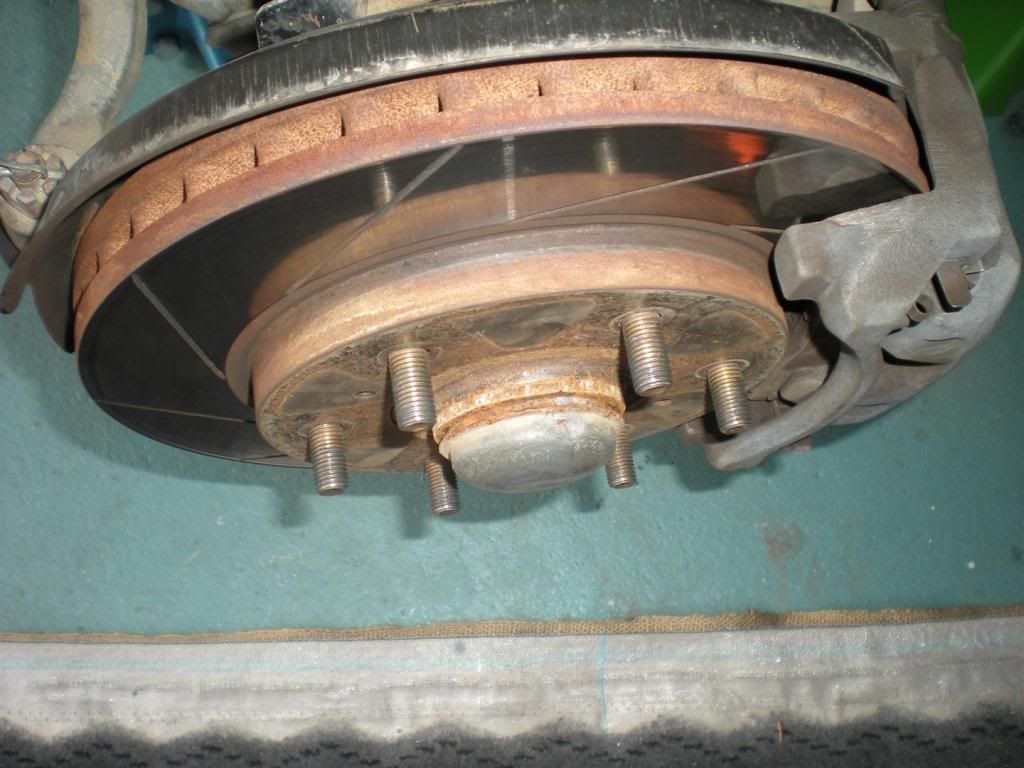
5. Remove the hub nut using the 32mm socket and an extension pipe if it’s very tight. To stop the wheel spinning put the car in 4wd 1st gear or Park…conversely have someone standing on the brakes.

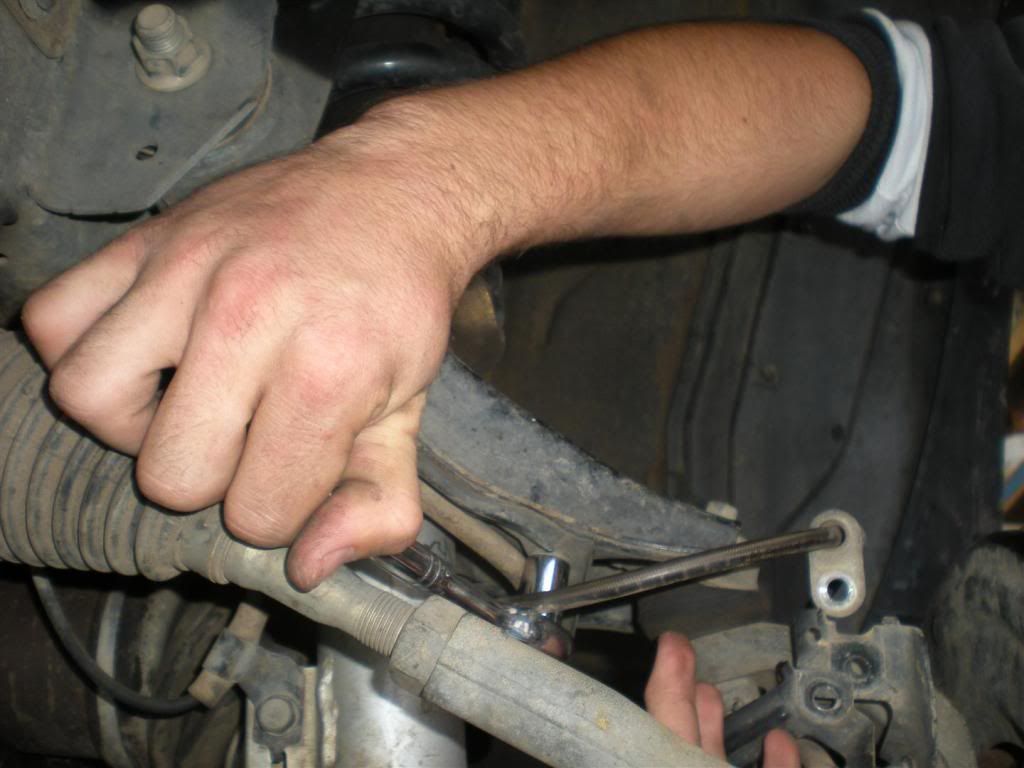
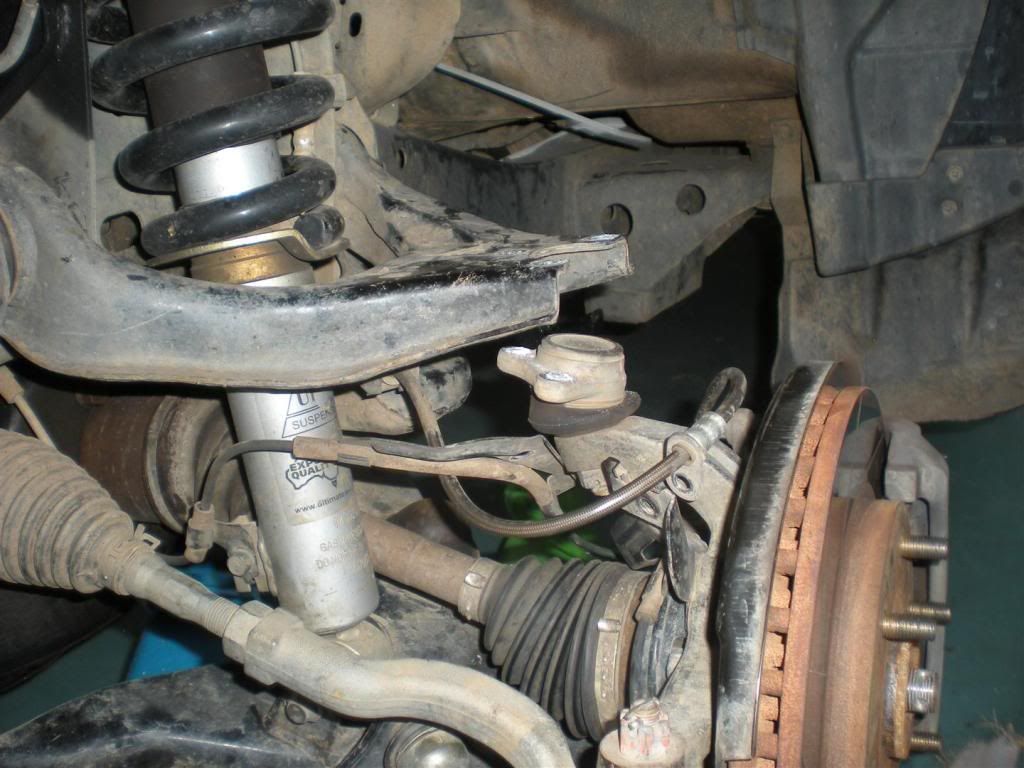
6. Remove the brake line bracket and ABS wire from the hub with the 12mm spanner. Remove the ABS wire from the UCA with the 12mm spanner.
Brake/ABS line from hub:
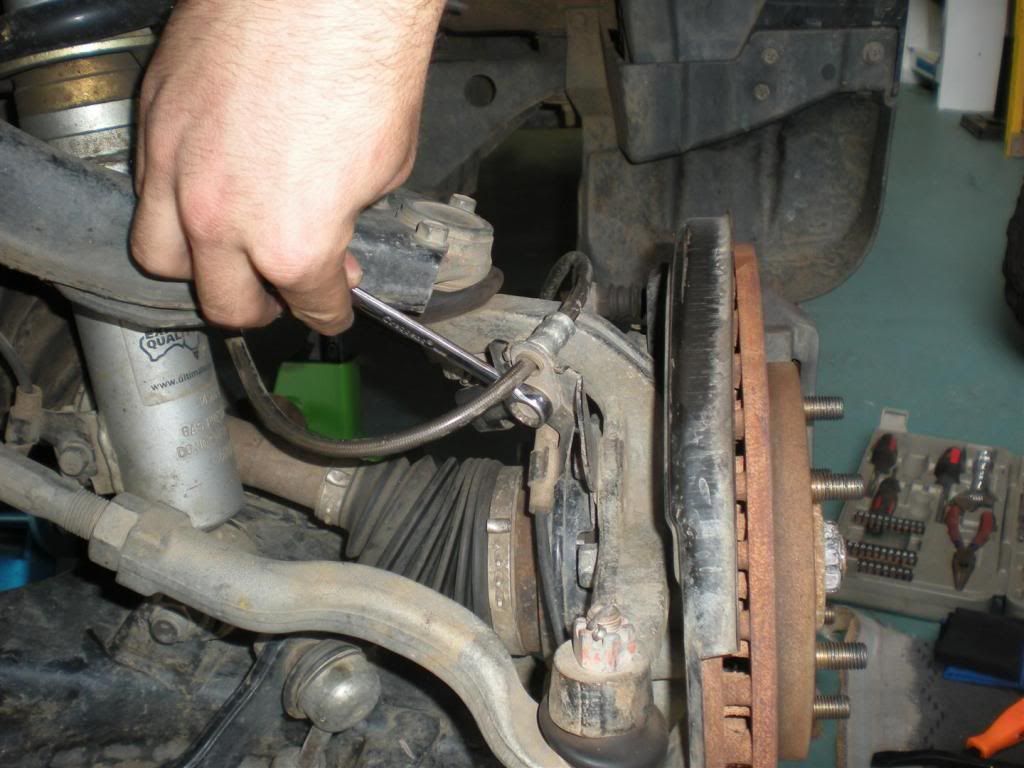
ABS line from UCA:
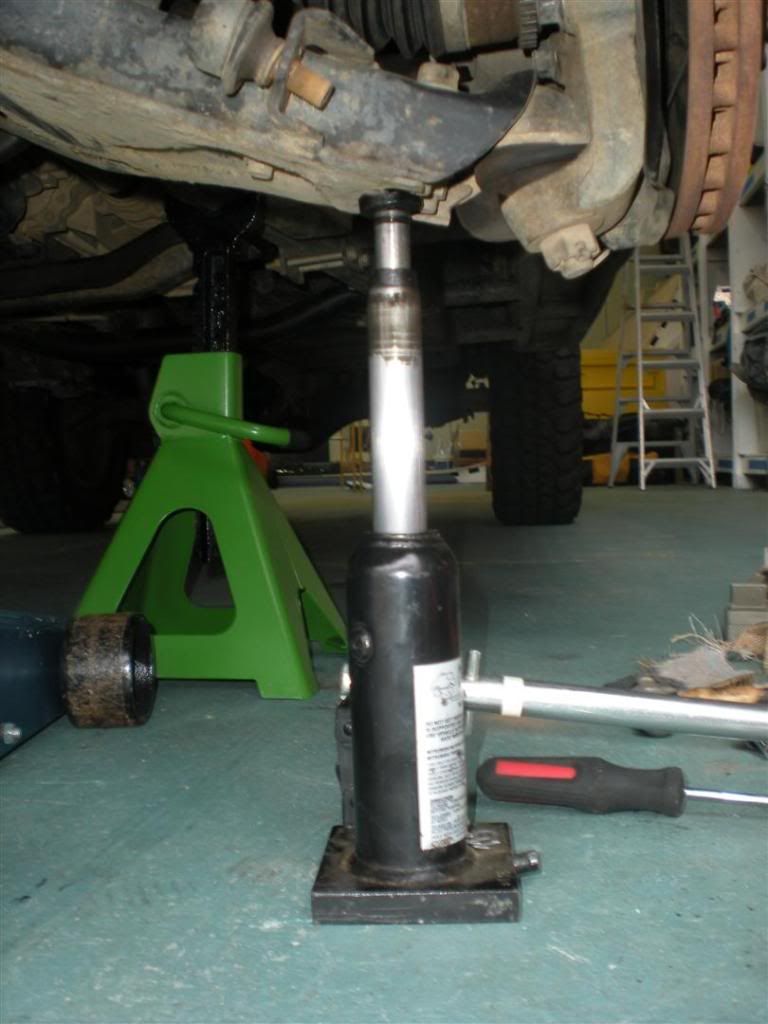
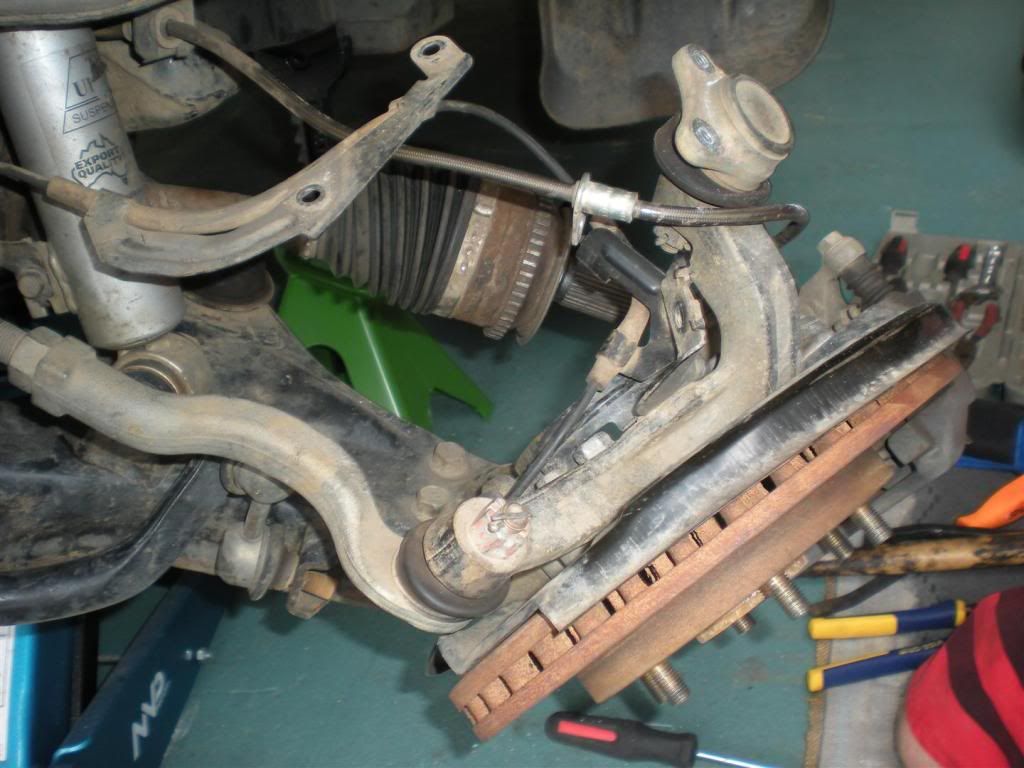
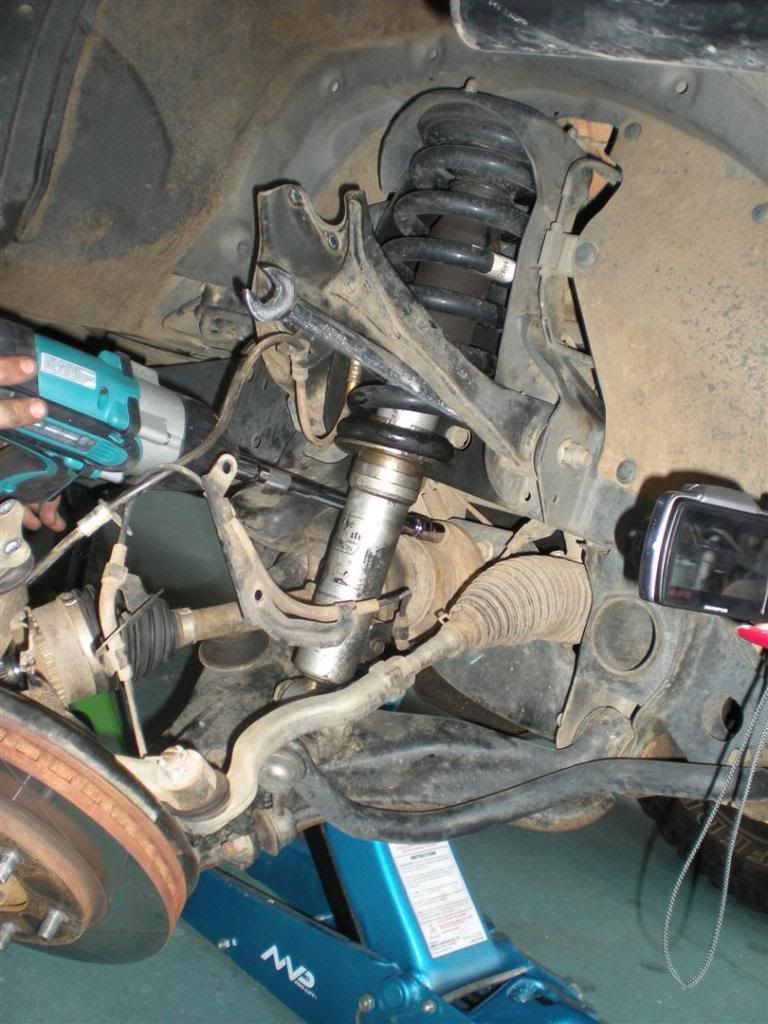
7. Upper Ball Joint Removal - Place a jack under the lower control arm and jack it up until the UCA is no longer hard against the chassis. This takes some of the pressure off the ball joint so that you can safely undo the 3x 12mm bolts that connect the upper ball joint to the UCA. Remove the centre bolt completely. Using a pry bar between chasis and upper control arm to remove tension, loosen the 2 end bolts a turn or two at a time until they are out – this is because they may still have a little spring pressure on them and removing one totally while leaving one in could potentially damage the last bolt/thread. There is not significant or dangerous pressure here, just potential component damage. These (3) 12mm bolts will need to have Loctite Threadlocker applied when they are replaced.
Placement of jack under LCA:
Cracking the (3) 12mm bolts:
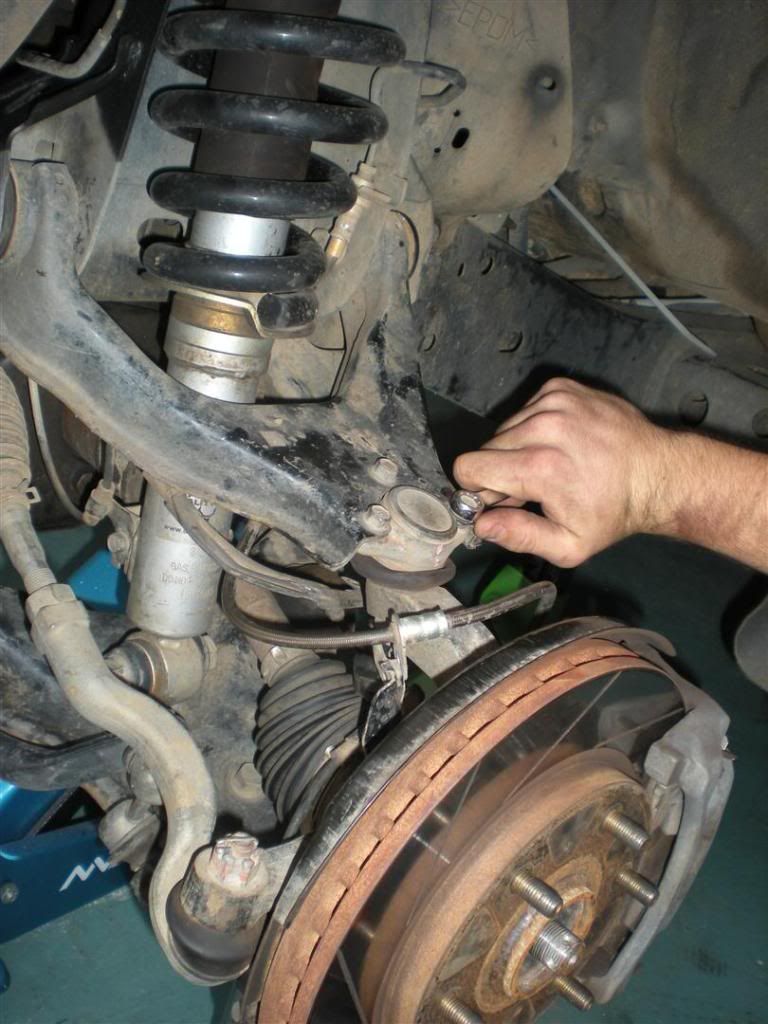
All bolts removed:
8. Lower the control arm down completely to allow the suspension to droop completely. Make sure the brake and ABS lines do not get caught on the upper ball joint as it swings forward.
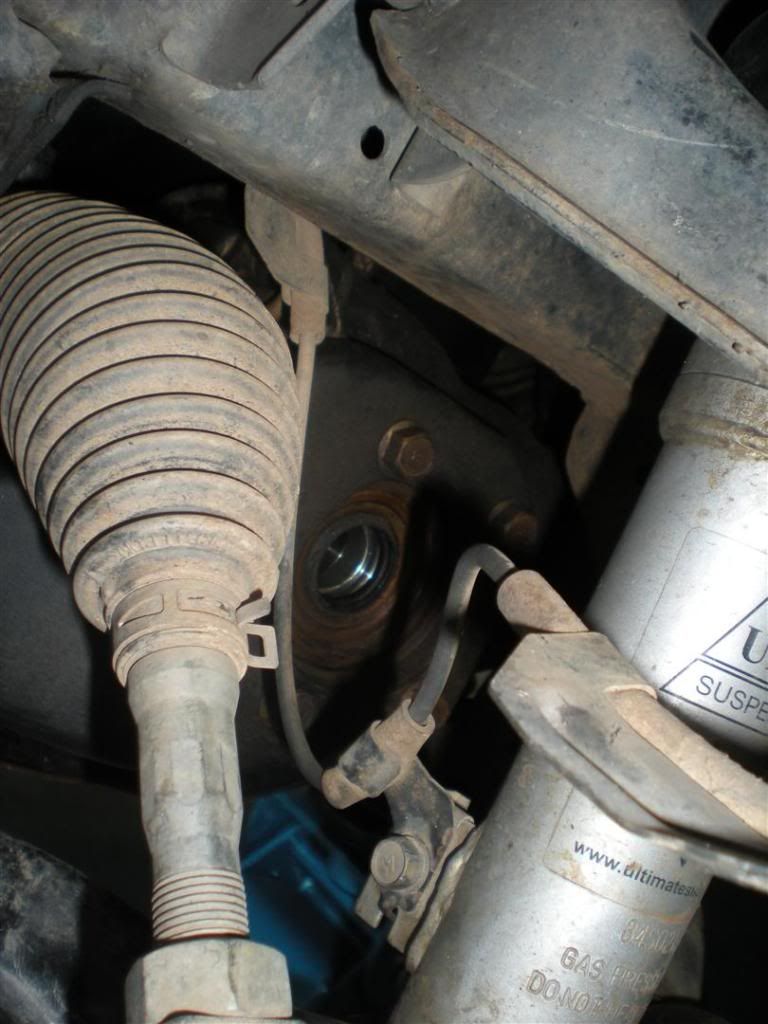
9. Using a small block of wood on the end of the CV, hit it with a hammer until the CV "pops" from the hub. You'll see it move backwards about 5-10mm, so check that you can freely remove it without needing to tap it out some more.
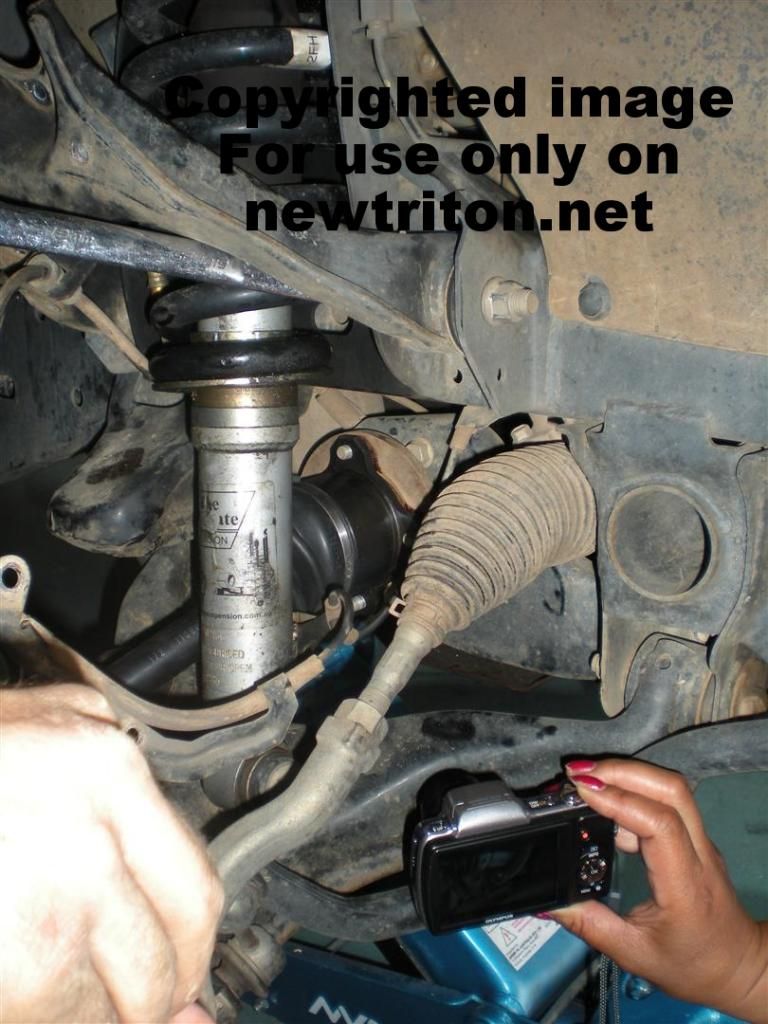
CV separated from Hub:
10. Look through to where the CV enters the front axle housing and identify the four bolts on the flange holding the CV to the axle housing. Using a number of extensions to get the reach, undo these bolts with your 14mm socket. If you have access to an air rattle gun or 18volt battery rattle gun use this as it is a nut and bolt and the speed may see the nut come off without spinning the bolt head on the other side (for this reason I would spray the nuts -the side facing you - with WD40 etc and have a beer in the hope they will come off without spinning the whole bolt). If not an angled pry bar or 14mm open-ended spanner is needed to "reach around" and hold the bolt head. Care must be taken not to damage the threads or nuts as the bolts are loose but “trapped” and can’t be fully removed so if a nut does not go back on to secure the bolt, it will slip backwards until it catches on the larger axle bolts behind here (the non rusty ones) and the wheel will not turn or will shear off when the wheel turns.
Removing the (4) 14mm Nuts using an 18V Rattle Gun:
You'll notice that there is a spanner holding the control arm up. I'd actually gotten it stuck there when I adjusted the UCA so it was further out of the way. This isn't necessary, more of a "I had the time and tools to do so easily"
11. Remove the CV from the axle.
Repco CV in place and ready to be re-attached:
12. Repeat the procedure to replace, but on the passenger side first carefully relocate the CV through the axle housing seal and then the spline into the axle.
PASSENGER SIDE
The steps are the same until step 9. This is a “double shaft” CV and the spline is further into the axle housing. The flange with 4 bolts is not used on this side; instead a small cir-clip holds the shaft into the diff. To remove a genuine CV, simply grab hold of the shaft and give it a quick yank. This will "pop" the CV out of the diff housing and is perfectly safe. To remove an aftermarket CV, you will need to get a small pry-bar in and lever the cup out, as the Repco CV's use a different bearing style to the original (yet to confirm the style Bursons supplied CV's are). Be careful not to damage the Axle Seal when removing/replacing the passenger side CV. It can be easily replaced using a crow-bar or flat screwdriver, but it's better to not have to worry. When replacing the Passenger Side CV, be sure to smear a small amount of grease onto the axle seal and the corresponding surface on the CV spline. This will help lubricate the seal and ensure it keeps the oil in.
CHANGING THE ABS RING
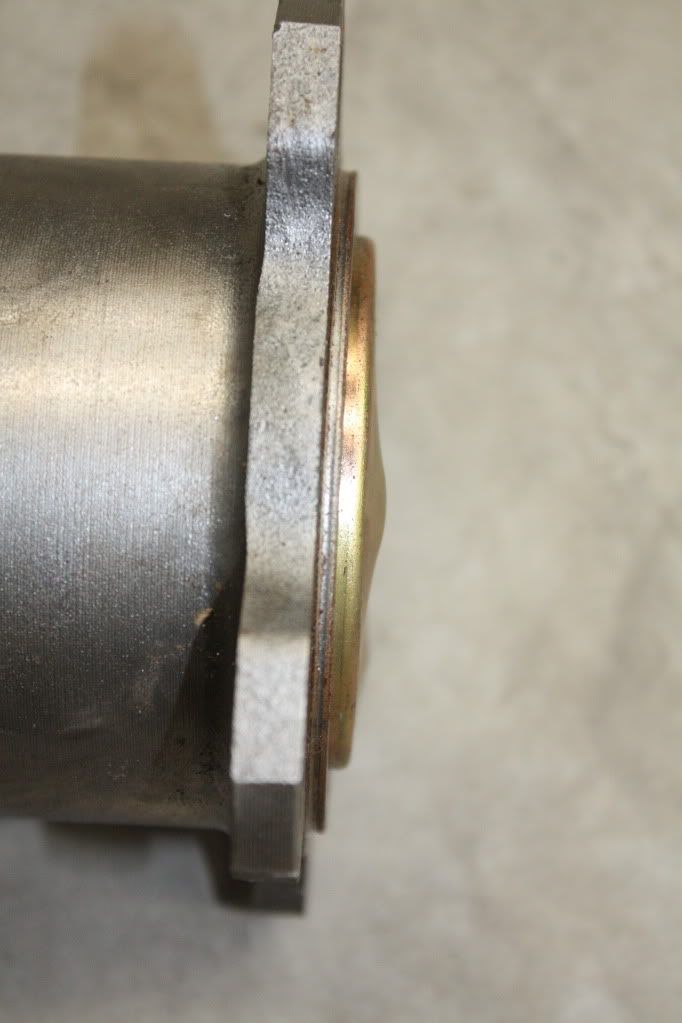
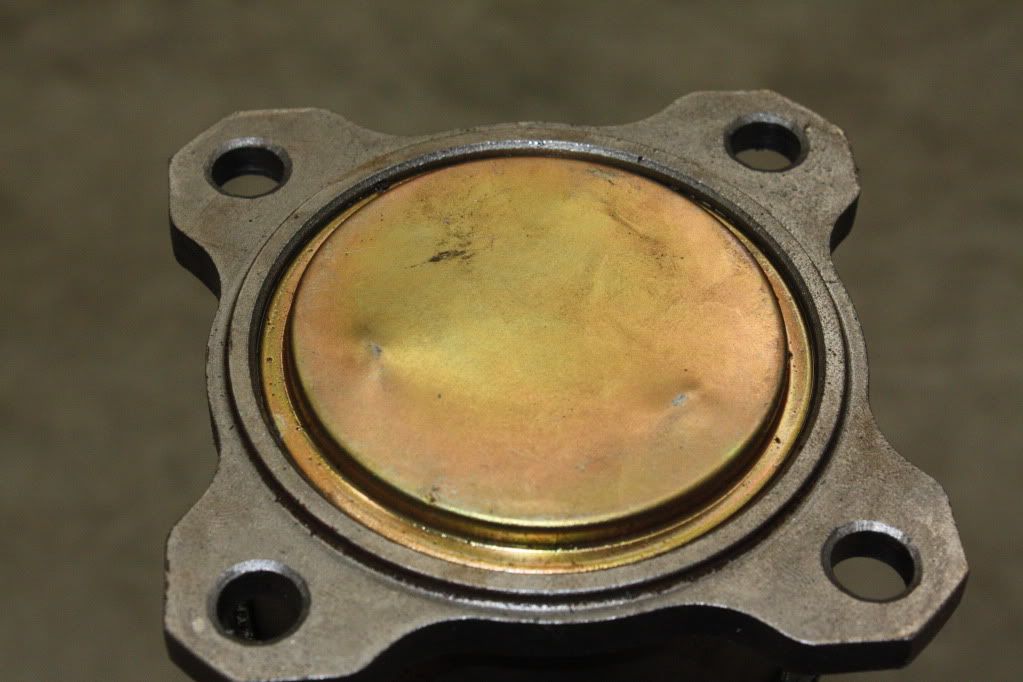
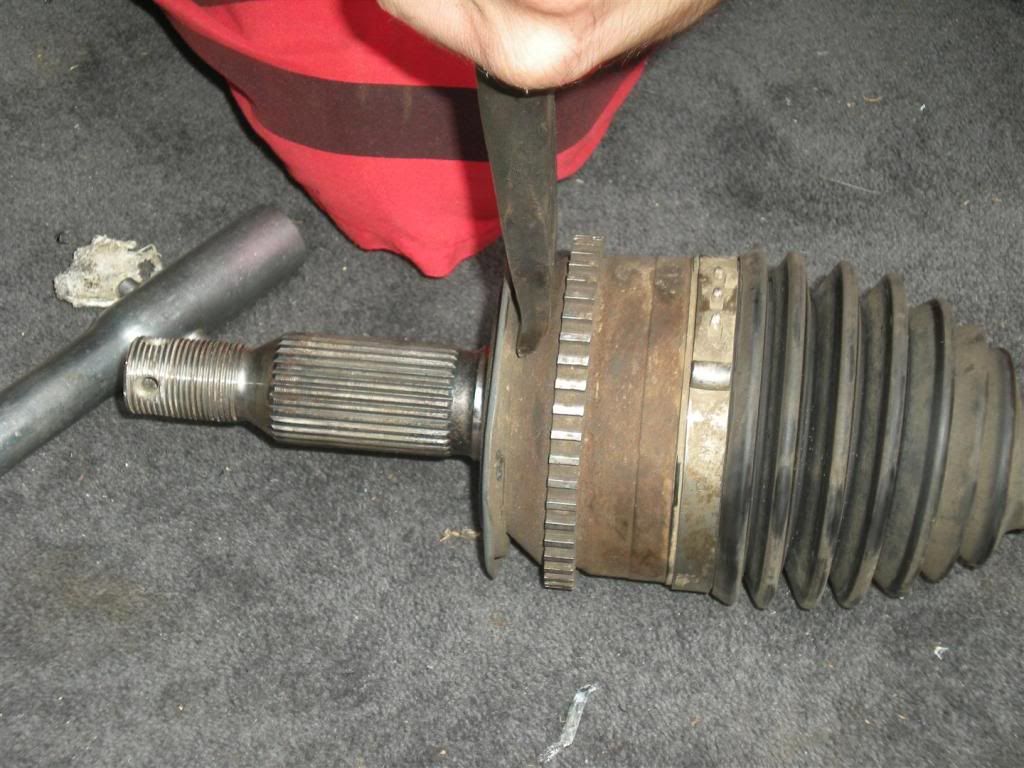
Repco CV's will require the supplied ABS ring to be removed and replaced with the original, and the repco dust-cover must be retained as the genuine will not fit. If you do not have a bearing puller handy, the Repco ABS ring can be removed with a cold-chisel by cutting through it. Be careful not to damage the CV.
Bursons supplied CV's do not have an ABS ring supplied, however the dust-cover is interchangeable.
1. With the CV laying flat on the ground, with a small chisel or flat screwdriver between the CV cup and the dust-cover carefully hammer the cover off, turning the cup as your go to make sure it is removed evenly.
2. Once the dust-cover has been removed, there are two methods of removing the ABS ring:
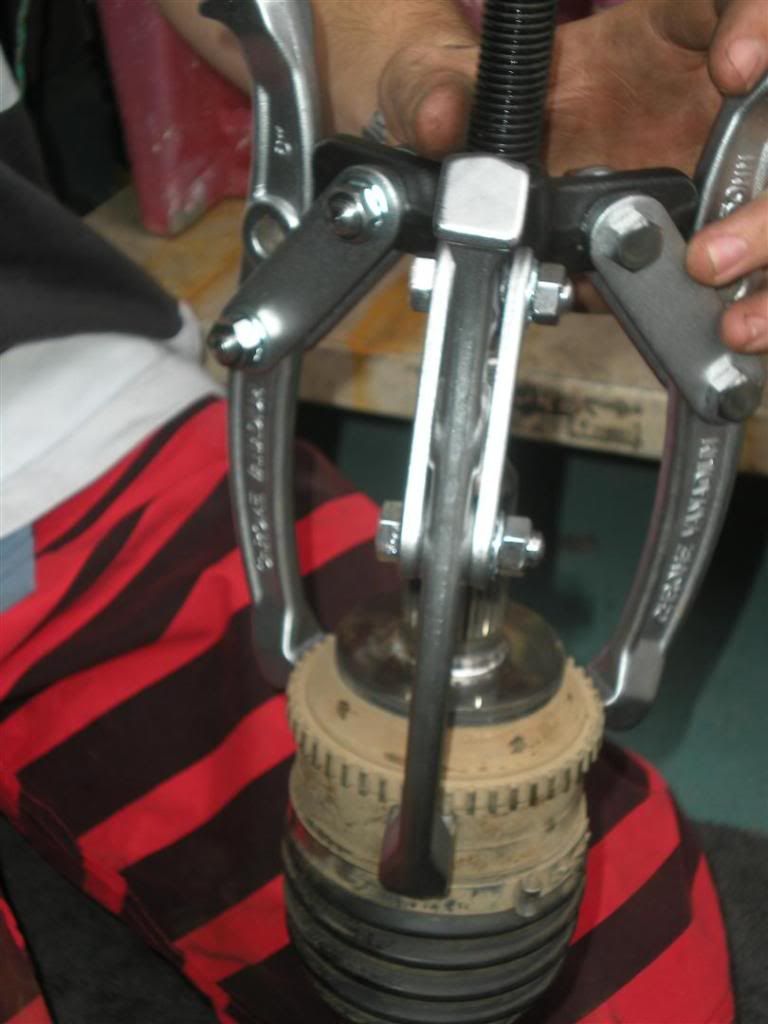
Bearing Puller - With the help of a friend or passing stranger to hold it all in place, use the bearing puller to gently remove the ABS ring from the original CV.
Flat Pin-Punch - With the help of a trusting friend or passing stranger, carefully hold the CV with the threaded spline facing down. With the punch hard up against the cup, gently tap the ABS ring off the CV, rotating it as you go. Generally tapping in opposites will ensure the ABS ring does not bend or warp.
3. With a hammer and the small lump of wood, carefully knock the ABS ring onto the new CV.
EDIT: You may need to tap it further on using the flat pin-punch. Tap it on the same way you would have gotten it off, and ensure it is down evenly.
4. Replace the dust-cover and fit the CV to the vehicle.