my MN rear diff breather installation guide

Engines, Gearboxes, Transfers, Tailshafts, Diffs, axles and CVs

my MN rear diff breather installation guide

Postby Jackfreeman47 on Mon May 08, 2017 4:43 pm

Hi all,
Last week I purchased a 2012 glx. Very happy with it so far. yesterday I worked on raising the rear diff breather to inside the canopy (front is already done).
After doing much research on the web i found very limited info on how to attach a raised breather to the factory triton one on the rear diff. The problem being the strange plastic breather that is pressed into the diff can't be removed simply by unscrewing it and screwing in a new adapter from a diff breather kit. A couple of people here had posted ideas but a lot seemed very complicated/involved machining new parts or removing the existing breather, altering it and re-gluing it back on.
So I decided to take some pics as I went and post them here to show step by step how I did mine.

What you'll need,
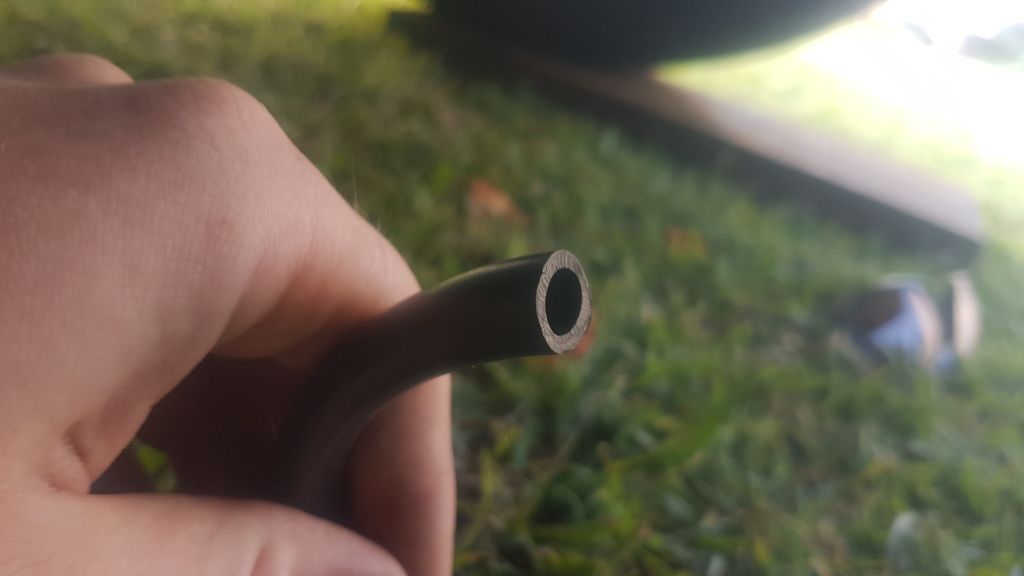
3m of radiator hose with 8mm internal diameter (i used this instead of fuel line as it a bit softer and can be molded over the existing breather and crimped tighter.)
A flexible adhesive that can stick to rubber and plastic.
Hose crimps
Zip ties (thin ones)
A filter of some kind, I used a small inline fuel filter.
10mm drill bit

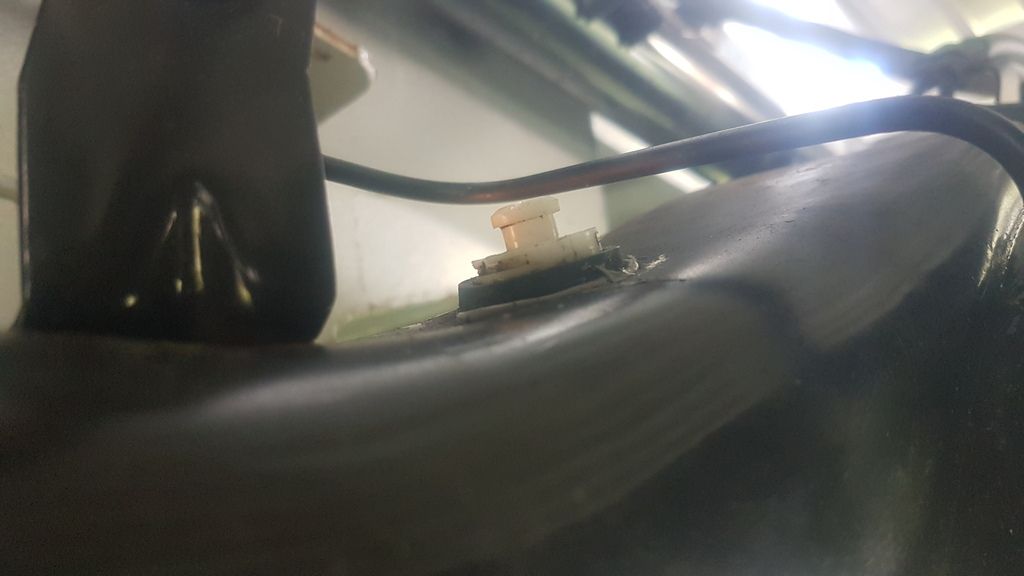
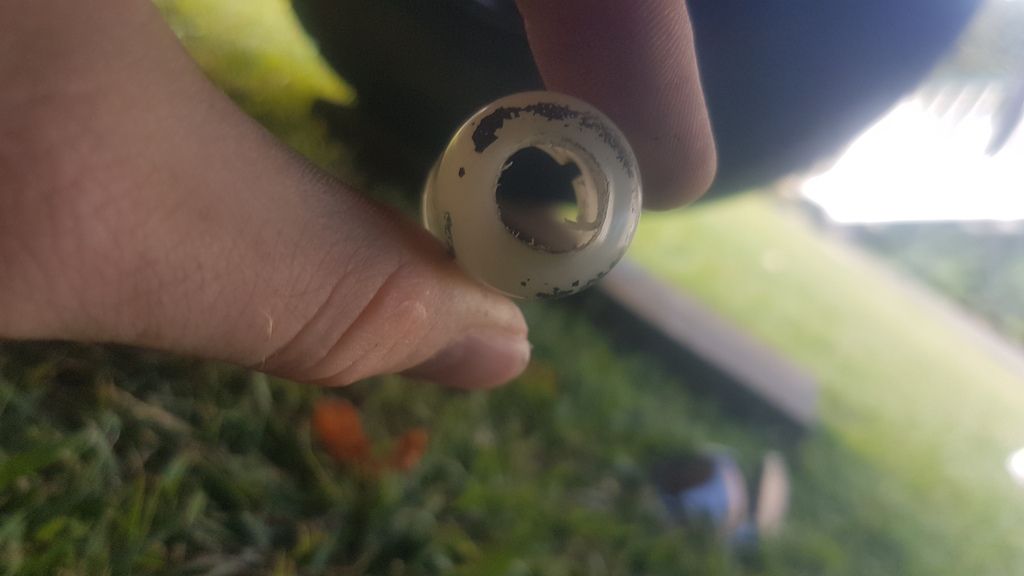
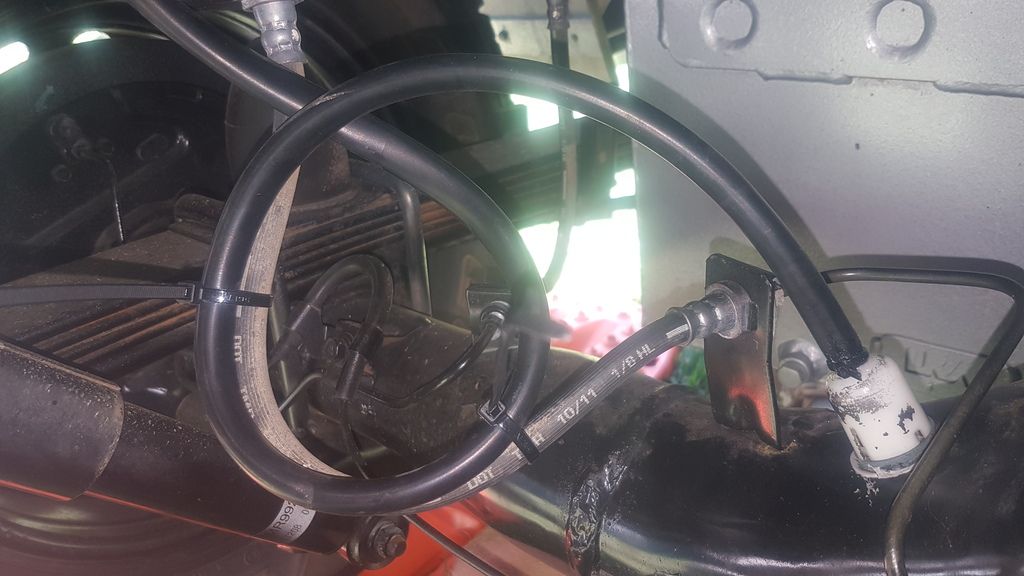
Starting off this is the original breather on the car. To get to it remove the white plastic cap (keep for later) and the metal valve (no longer needed) underneath to expose the plastic breather pipe. These should both come off easily

Click to view larger picture

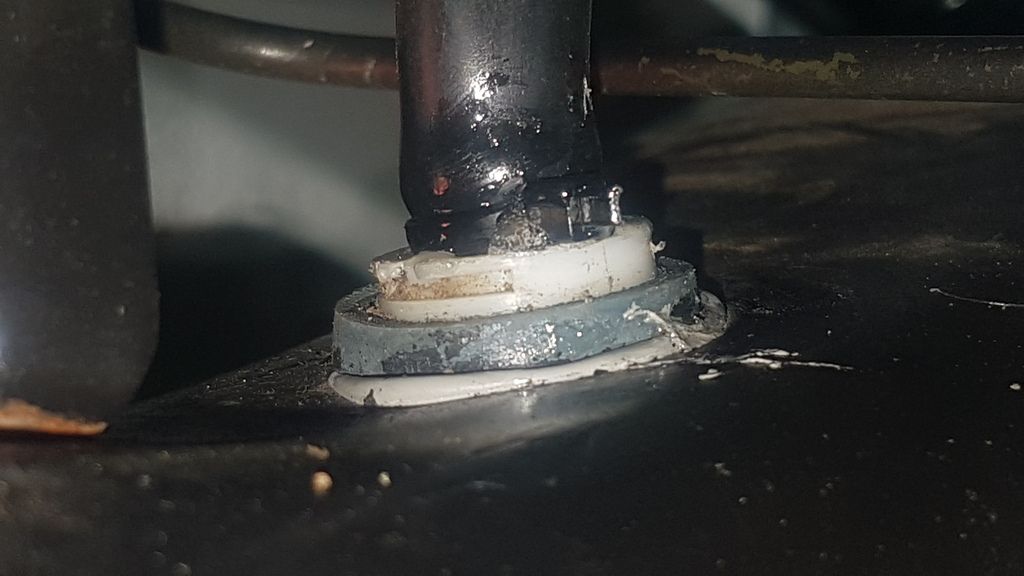
Clean off all dirt and oil and apply some adhesive to the outside if the plastic breather pipe and the bottom of the 8mm hose.

Click to view larger picture

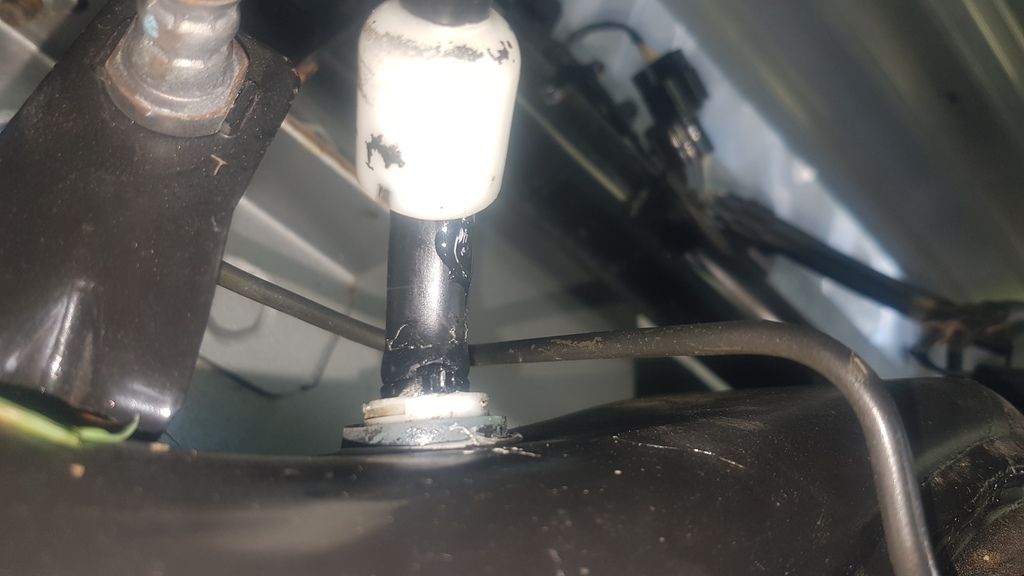
stretch the hose over the breather and firmly press it down as much as possible. run a zip tie around to keep it in place, (make sure the zip tie is thin enough to fit below where the breather flares out for maximum bite). Add more adhesive around the base of the hose to seal this off. Once dry this should be enough to keep the pipe secured to the breather.

Click to view larger picture

As some extra strength and protection I then fixed the original plastic cap back on over the pipe, do this by drilling a hole through the top just smaller than the radiator hose.

Click to view larger picture

Then feed it over the pipe.

Click to view larger picture

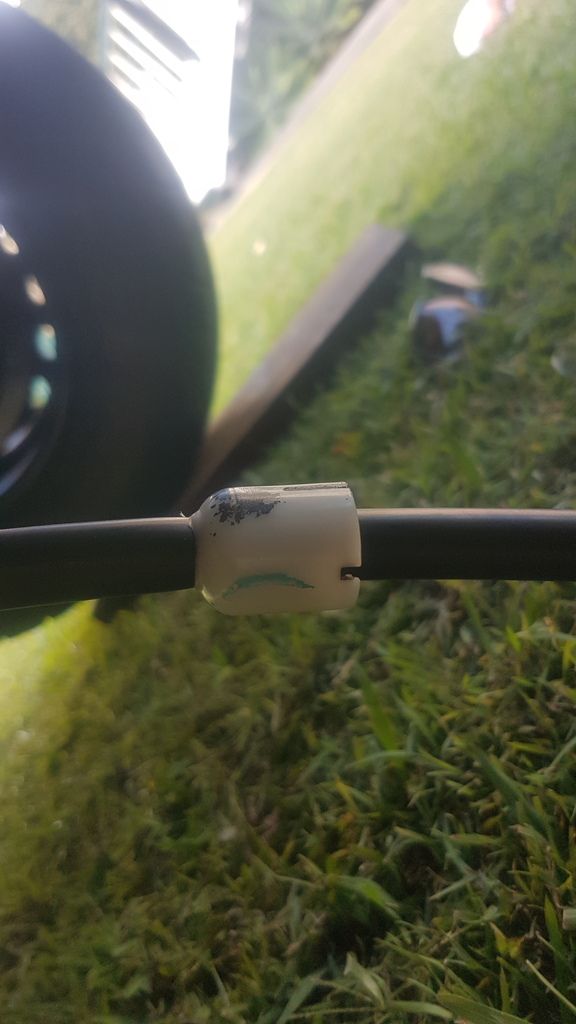
Add some adhesive to the pipe around where the top of the cap will sit.

Click to view larger picture

Then clip the cap back down and add a zip tie on top to keep it secure

Click to view larger picture

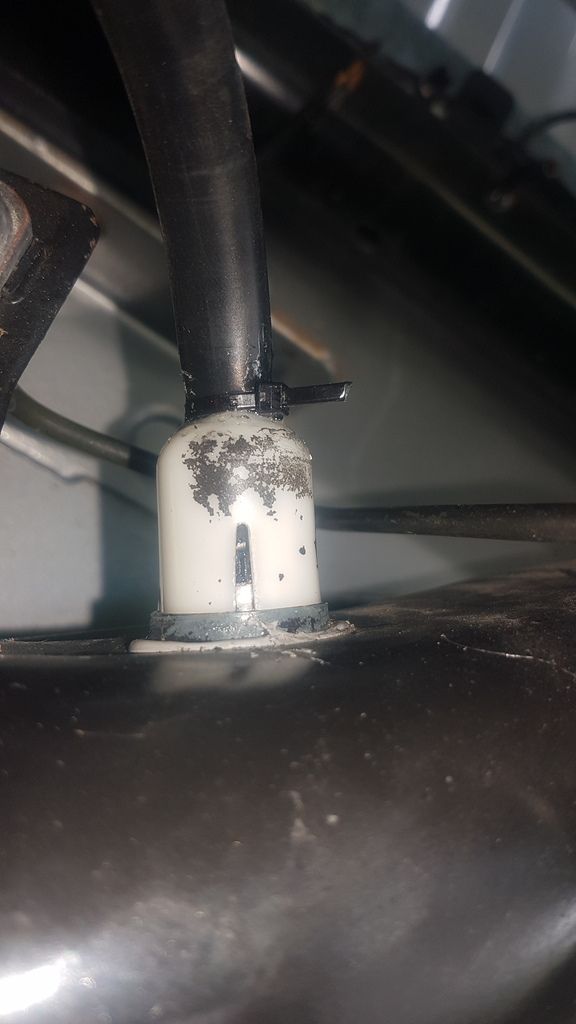
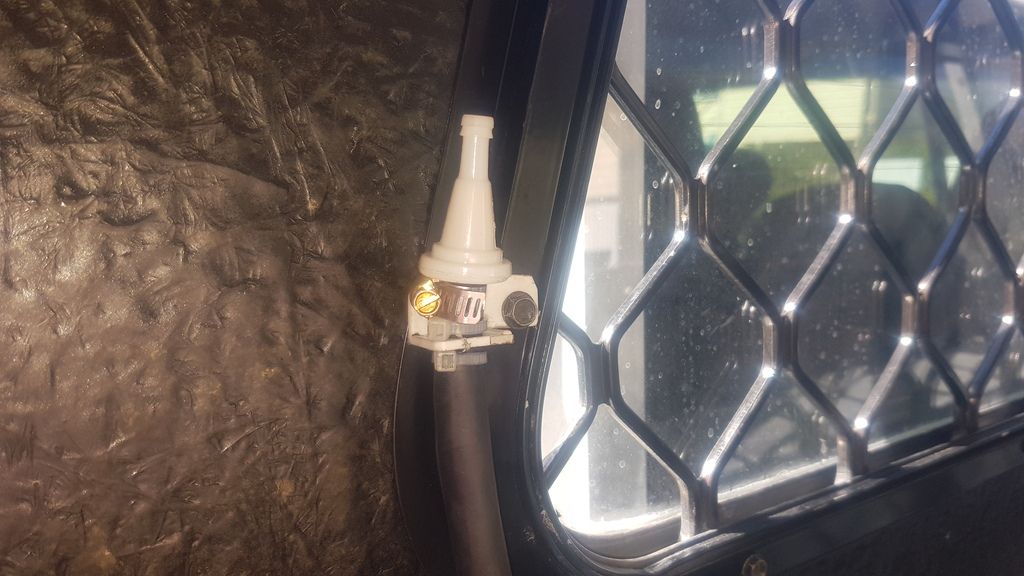
from here run the pipe up to a high/dry location ( be sure to leave enough slack to allow for axle articulation). I drilled a hole in the tray and went to the inside of the canopy. then add your new filter/breather to the end

Click to view larger picture

Click to view larger picture

Hope someone finds this helpful,
Ta,
Jack
Jackfreeman47
 
Posts: 2
Joined: Wed May 03, 2017 11:45 am


Re: my MN rear diff breather installation guide

Postby Mayhem2015 on Tue May 09, 2017 3:58 pm

You make it look sooo easy mate. Thanks for that.

Is there a step by step for the front someone round here. I figure if I am going to do the back I may as well do the front too.

Also..........I have a manual. Does the gearbox have a breather too or is it just automatics that require breath?
Keeping the shiny side up since 1984. :D
User avatar
Mayhem2015
 
Posts: 166
Joined: Wed Jun 17, 2015 5:53 pm
Location: Jandakot, WA.

Re: my MN rear diff breather installation guide

Postby explorer.dave on Tue May 09, 2017 4:55 pm

The front breather in the MN is already raised to the top firewall so not much point really.
Better to be silent and thought a fool than open your mouth and remove all doubt.[

[b]Penrith Panthers 2021..Finally :roll:


Posts should be like mini skirts, long enough to cover the subject matter, but short enough to keep things interesting
User avatar
explorer.dave
Platinum Subscriber
 
Posts: 977
Joined: Wed Dec 18, 2013 9:32 am
Location: South Lake, Perth

Re: my MN rear diff breather installation guide

Postby Jackfreeman47 on Wed May 10, 2017 8:40 am

It wasn't to hard man, took maybe 2hrs, with dads help. Mine's a tray back so taking the spare Tyre out gave me heaps of room to work.

As said the front breather is already raised up to the fire wall.

Not sure about the gear/transfer box but i dont do anything too extreme so not going to bother.
Jackfreeman47
 
Posts: 2
Joined: Wed May 03, 2017 11:45 am

Re: my MN rear diff breather installation guide

Postby 2014mn on Wed May 10, 2017 3:23 pm

Good Job Mate,

I did something very similar except used vacumn line.

There was another post on this forum somewhere which i basically copied.

Great step by step guide with pics :)
2014mn
 
Posts: 8
Joined: Sun Jul 26, 2015 6:54 pm

Re: my MN rear diff breather installation guide

Postby Scale on Wed May 10, 2017 5:37 pm

Thanx Jack nice job.
User avatar
Scale
 
Posts: 414
Joined: Sat Feb 02, 2013 6:31 pm
Location: Victoria

Re: my MN rear diff breather installation guide

Postby Shwa on Tue May 30, 2017 10:20 am

Has anyone done the transfer/gearbox breathers?
It's not the time in the life that matters, it's the life in the time!
Shwa
 
Posts: 42
Joined: Mon May 14, 2012 6:18 pm
Location: Townsville QLD

Re: my MN rear diff breather installation guide

Postby explorer.dave on Tue May 30, 2017 11:00 am

Shwa wrote:Has anyone done the transfer/gearbox breathers?


Yes, should be able to find this easy enough with a search.
Better to be silent and thought a fool than open your mouth and remove all doubt.[

[b]Penrith Panthers 2021..Finally :roll:


Posts should be like mini skirts, long enough to cover the subject matter, but short enough to keep things interesting
User avatar
explorer.dave
Platinum Subscriber
 
Posts: 977
Joined: Wed Dec 18, 2013 9:32 am
Location: South Lake, Perth


Return to Drive Train Components

Who is online

Users browsing this forum: No registered users and 8 guests